Creating triggers in PostgreSQL to monitor changes in tables


Introduction
In a database management system, triggers are special types of stored procedures that are automatically executed in response to specific database events, such as insert, update, or delete operations on a table. Triggers can be used for a variety of purposes, such as enforcing data integrity rules, logging changes to a table, or sending notifications when certain events occur.
In this article, we will discuss how to create triggers in PostgreSQL that can send notifications when records are inserted, updated, or deleted from a table. We will use the NOTIFY statement to send notifications, and we will include information about the table name, action type, timestamp, and data that was changed in the notification payload.
Trigger for Insert Operations
To create a trigger that sends a notification when a record is inserted into a table, we can use the AFTER INSERT trigger. This trigger fires after a record is inserted into the table, but before the transaction that contains the INSERT statement is committed.
Here’s the code to create a trigger for insert operations:
CREATE OR REPLACE FUNCTION employee_insert_trigger() RETURNS TRIGGER AS $$
DECLARE
  notification JSON;
BEGIN
  notification := json_build_object(
    'table', TG_TABLE_NAME,
    'action', 'insert',
    'time', round(EXTRACT(epoch from clock_timestamp()) * 1000)::bigint,
    'data', row_to_json(NEW)
  )::text;
  NOTIFY employee_table_changes, notification;
  RETURN NEW;
END;
$$ LANGUAGE plpgsql;

CREATE TRIGGER employee_insert AFTER INSERT ON employee
FOR EACH ROW
EXECUTE FUNCTION employee_insert_trigger();
Let’s go over this code step by step.
First, we define a function named employee_insert_trigger() that returns a TRIGGER. This function will be executed whenever an INSERT operation is performed on the employee table.
Inside the function, we declare a variable named notification of type JSON. This variable will hold the notification payload that will be sent to the channel.
Next, we use the json_build_object() function to create a JSON object that contains the following key-value pairs:
table: The name of the table that was changed (in this case,employee).action: The type of action that was performed (in this case,insert).time: The timestamp (in milliseconds) at which the trigger was fired.data: The data that was inserted (in this case, theNEWrecord).
We then convert the JSON object to a text string using the ::text cast.
Next, we use the NOTIFY statement to send the notification to the employee_table_changes channel, along with the notification payload that we just created.
Finally, we return the NEW record, which allows the INSERT operation to proceed normally.
We also create a trigger named employee_insert that fires after an INSERT operation is performed on the employee table. This trigger calls the employee_insert_trigger() function for each row that is inserted into the table.
Trigger for Update Operations
To create a trigger that sends a notification when a record is updated in a table, we can use the AFTER UPDATE trigger. This trigger fires after a record is updated, but before the transaction that contains the UPDATE statement is committed.
Here’s the code to create a trigger for update operations:
CREATE OR REPLACE FUNCTION employee_update_trigger() RETURNS TRIGGER AS $$
DECLARE
  notification JSON;
BEGIN
  notification := json_build_object(
    'table', TG_TABLE_NAME,
    'action', 'update',
    'time', round(EXTRACT(epoch from clock_timestamp()) * 1000)::bigint,
    'data', json_build_object(
      'old', row_to_json(OLD),
      'new', row_to_json(NEW)
    )
  )::text;
  NOTIFY employee_table_changes, notification;
  RETURN NEW;
END;
$$ LANGUAGE plpgsql;

CREATE TRIGGER employee_update AFTER UPDATE ON employee
FOR EACH ROW
EXECUTE FUNCTION employee_update_trigger();
This code is similar to the code for the insert trigger, with a few differences.
First, we define a function named employee_update_trigger() that returns a TRIGGER. This function will be executed whenever an UPDATE operation is performed on the employee table.
We also create a trigger named employee_update that fires after an UPDATE operation is performed on the employee table. This trigger calls the employee_update_trigger() function for each row that is updated in the table.
Trigger for Delete Operations
To create a trigger that sends a notification when a record is deleted from a table, we can use the AFTER DELETE trigger. This trigger fires after a record is deleted from the table, but before the transaction that contains the DELETE statement is committed.
Here’s the code to create a trigger for delete operations:
CREATE OR REPLACE FUNCTION employee_delete_trigger() RETURNS TRIGGER AS $$
DECLARE
  notification JSON;
BEGIN
  notification := json_build_object(
    'table', TG_TABLE_NAME,
    'action', 'delete',
    'time', round(EXTRACT(epoch from clock_timestamp()) * 1000)::bigint,
    'data', row_to_json(OLD)
  )::text;
  NOTIFY employee_table_changes, notification;
  RETURN OLD;
END;
$$ LANGUAGE plpgsql;

CREATE TRIGGER employee_delete AFTER DELETE ON employee
FOR EACH ROW
EXECUTE FUNCTION employee_delete_trigger();
This code is similar to the code for the insert and update triggers, with a few differences.
Triggers for Insert, Update and Delete Operations in a single function
We can write all the trigger functions for INSERT, UPDATE, and DELETE operations in a single function using an IF-ELSE block. This can help reduce code duplication and make it easier to manage the triggers.
Here’s an example of how we can write a single trigger function that handles all three types of operations:
CREATE OR REPLACE FUNCTION employee_trigger()
RETURNS TRIGGER AS $$
DECLARE
  notification JSON;
BEGIN
  IF (TG_OP = 'INSERT') THEN
    notification := json_build_object(
      'table', 'employee',
      'action', 'insert',
      'time', extract(epoch from clock_timestamp()) * 1000,
      'data', row_to_json(NEW)
    )::text;
  ELSIF (TG_OP = 'UPDATE') THEN
    notification := json_build_object(
      'table', 'employee',
      'action', 'update',
      'time', extract(epoch from clock_timestamp()) * 1000,
      'data', json_build_object(
        'old', row_to_json(OLD),
        'new', row_to_json(NEW)
      )
    )::text;
  ELSIF (TG_OP = 'DELETE') THEN
    notification := json_build_object(
      'table', 'employee',
      'action', 'delete',
      'time', extract(epoch from clock_timestamp()) * 1000,
      'data', row_to_json(OLD)
    )::text;
  END IF;

  PERFORM pg_notify('employee_table_changes', notification);

  RETURN NEW;
END;
$$ LANGUAGE plpgsql;
In this function, we use an IF-ELSE block to check the value of the TG_OP variable, which indicates the type of operation that triggered the function. Depending on the operation type, we create a notification payload using the appropriate data.
For INSERT operations, we use the NEW variable to get the newly inserted row and create a notification payload that includes the table name, the action type (insert), the current timestamp, and the new data in JSON format.
For UPDATE operations, we use both the OLD and NEW variables to get the old and new rows, respectively. We then create a notification payload that includes the table name, the action type (update), the current timestamp, and an object that contains the old and new data in JSON format.
For DELETE operations, we use the OLD variable to get the deleted row and create a notification payload that includes the table name, the action type (delete), the current timestamp, and the old data in JSON format.
We then use the PERFORM pg_notify() statement to send the notification payload to the employee_table_changes channel.
Finally, we return the NEW row, which allows the operation to proceed normally.
To use this trigger function, we need to create a trigger for each table and operation type that we want to track. For example, we can create an AFTER INSERT OR UPDATE OR DELETE trigger for the employee table using the following statement:
CREATE TRIGGER employee_trigger
AFTER INSERT OR UPDATE OR DELETE ON employee
FOR EACH ROW
EXECUTE FUNCTION employee_trigger();
This will call the employee_trigger() function for each row that is inserted, updated, or deleted from the employee table.
Using a single trigger function for all types of operations can make it easier to manage triggers, especially when working with multiple tables. However, it can also make the code more complex and harder to debug.
Testing the Triggers
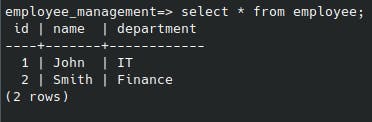
This is how our employee table looks like:
To test our triggers, we need to listen to the employee_table_changes channel in the database using the following command:
LISTEN employee_table_changes;
Once we’re listening to the channel, we can perform some INSERT, UPDATE, and DELETE operations on the employee table and observe the notifications that are sent to the channel.
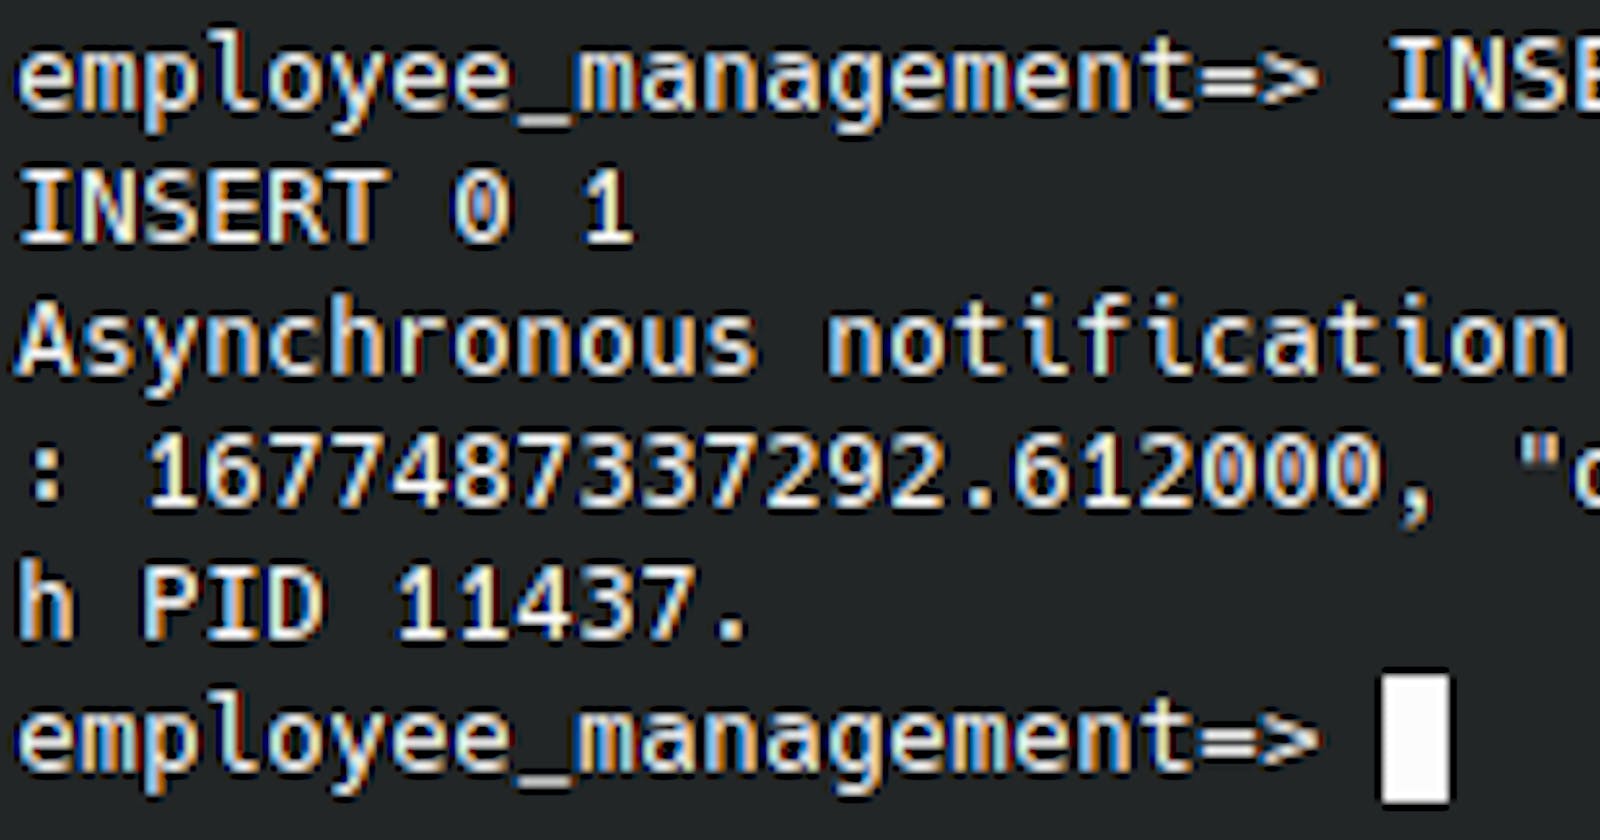
Let’s start by inserting a new employee into the employee table:
INSERT INTO employee (name, department) VALUES ('Alice', 'Marketing');
After running this INSERT statement, a notification should be sent to the employee_table_changes channel with the following payload:

Next, we can update Alice’s department using the following UPDATE statement:
UPDATE employee SET department = 'Sales' WHERE name = 'Alice';
After running this UPDATE statement, a notification should be sent to the employee_table_changes channel with the following payload:

Finally, we can delete Alice’s record using the following DELETE statement:
DELETE FROM employee WHERE name = 'Alice';
After running this DELETE statement, a notification should be sent to the employee_table_changes channel with the following payload:

By using triggers and notifications, we can easily track changes to a database table and respond to them in real-time. This can be useful for building real-time applications or monitoring systems that need to react to changes in a database.